1. 前言
具体细节参考 Vue 官方文档 ,本章节会详细讲解到 Vue 组件开发。
本章节的案例会涉及到前两章的内容
具体内容如下
2. 什么是组件❔
组件:在程序中组件就是对数据和方法的简单封装。
Vue 组件:这是 Vue 的亮点之一,组件 允许我们将 UI 划分为独立的、可重用的部分,并且可以对每个部分进行单独的思考。
例子:例如一个表单包含如下内容(搜索栏、列表页、分页条、新增|编辑页、详情页),那我们就可以通过组件化的思想将这些模块封装成一个个组件。

3. 组件注册
在 Vue 中,如果我们需要某些地方使用到组件,那么就必须要进行注释。
我将会通过两种方式进行组件注册:
3.1. 全局注册
全局注册:在应用的任何地方都可以使用的组件称为全局组件。
1
2
| # tagName 为组件名,options 为配置选项
Vue.component(tagName, options)
|
假设,我们需要在全局注册。那我们我们在 main.js 进行注册组件即可
1
2
3
4
5
6
7
8
9
10
| import Vue from 'vue';
import App from './App.vue';
# MyComponent被全局注册为my-component,这意味着你可以在应用中的任何地方使用<my-component></my-component>标签。
import MyComponent from './components/MyComponent.vue';
Vue.component('my-component', MyComponent);
new Vue({
render: h => h(App)
}).$mount('#app');
|
3.2. 局部注册
局部注册:将组件限制在一个特定的 Vue 实例或另一个组件的作用域内。
假设,我们需要在局部注册。那我们我们在 局部组件 引入组件即可。
1
2
3
4
5
6
7
8
9
10
11
12
13
14
15
16
|
<template>
<div>
<my-component></my-component>
</div>
</template>
<script>
import MyComponent from './MyComponent.vue';
export default {
components: {
'my-component': MyComponent
},
};
</script>
|
4. 组件通信
组件通信:这个模块是非常非常重要的,Vue 的特色组件化。既然涉及到组件化了,那么就一定会涉及到组件之间的通信。
我们会通过如下内容来讲解组件通信
- 父子组件通信(props、$emit)
- 父组件访问子组件($refs)
4.1. 父子组件通信
父子组件:通过官网的组件图可以看到,组件和组件之间是存在层级关系的,我们这里主要讨论父子组件。
4.1.1. props
props:是用于将数据从父组件传递到子组件的机制。父组件通过将数据绑定到子组件的属性上,使子组件可以接受并使用这些数据。
props 可以是任何类型的数据,包括字符串、数字、对象、数组等。
1
2
3
4
5
6
7
8
| export default {
props: {
filed: {
type: Boolean,
default: true
}
},
}
|
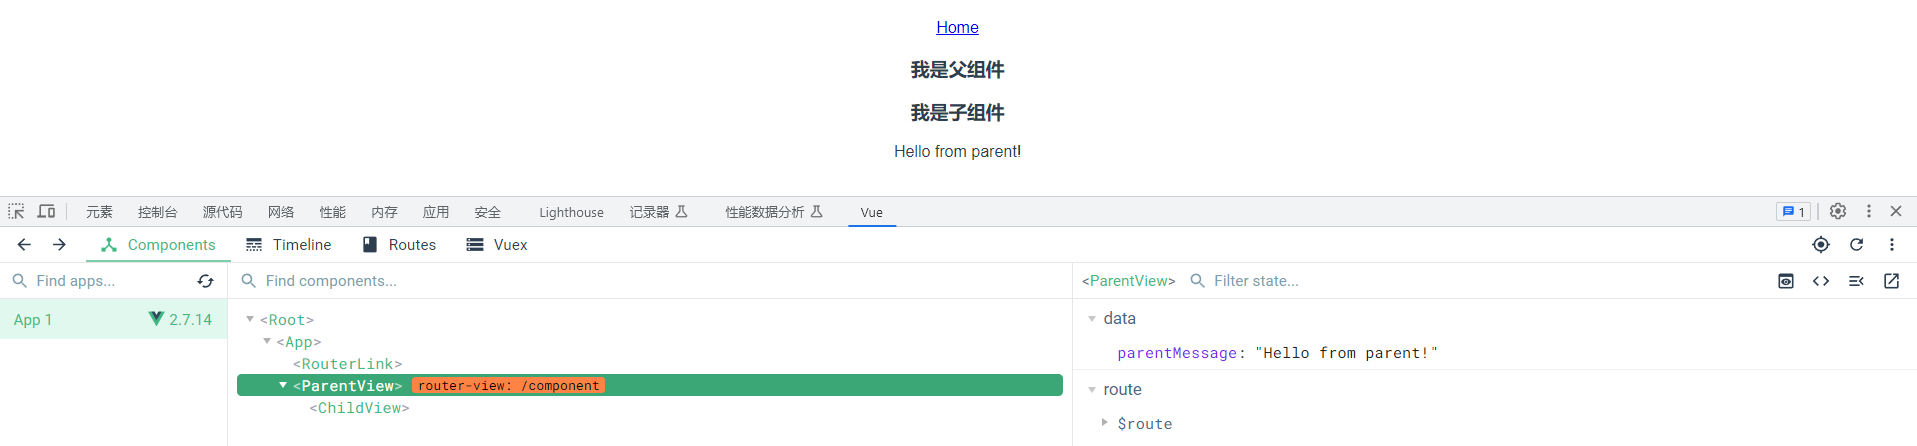
假设我们需要通过父组件向子组件进行传值
1
2
3
4
5
6
7
8
9
10
11
12
13
14
15
16
17
18
19
20
21
| <template>
<div>
<h3> 我是父组件 </h3>
<child-view :message="parentMessage" />
</div>
</template>
<script>
import ChildView from './ChildView.vue';
export default {
components: {
ChildView,
},
data() {
return {
parentMessage: 'Hello from parent!',
};
},
};
</script>
|
1
2
3
4
5
6
7
8
9
10
11
12
13
14
15
16
| <template>
<div>
<h3>我是子组件</h3>
<p>{{ message }}</p>
</div>
</template>
<script>
export default {
props: {
message:{
type: String
}
},
};
</script>
|
4.1.2. $emit
$emit :是用于在子组件中触发自定义事件,并向父组件发送消息的方法。
子组件可以使用 $emit 来通知父组件发生了某些事件或状态的变化,从而实现子组件向父组件传递数据。
假设我们在子组件中与父组件通信。
1
2
3
4
5
6
7
8
9
10
11
12
13
14
15
16
| <template>
<div>
<h3>我是子组件</h3>
<button @click="sendEventToParent">向父组件发送消息</button>
</div>
</template>
<script>
export default {
methods: {
sendEventToParent() {
this.$emit('child-event', 'Hello from child!');
},
},
};
</script>
|
1
2
3
4
5
6
7
8
9
10
11
12
13
14
15
16
17
18
19
20
21
22
23
24
25
26
27
28
| <template>
<div>
<h3>我是父组件</h3>
<p>{{ message }}</p>
<child-view @child-event="handleChildEvent" />
</div>
</template>
<script>
import ChildView from './ChildView.vue';
export default {
components: {
ChildView
},
data() {
return {
message : ''
}
},
methods: {
handleChildEvent(messageFromChild) {
this.message = messageFromChild
console.log('Message from child:', messageFromChild);
},
},
};
</script>
|
4.2. 父组件访问子组件
4.2.1. $refs
$refs 是 Vue.js 提供的一个特殊属性,用于在组件中访问被标记为 ref 的子组件或 DOM 元素。通过 $refs,你可以在父组件中直接引用子组件的实例或操作 DOM 元素,而不需要通过事件或 props 进行数据传递。
1
2
3
4
5
6
7
8
9
10
11
12
13
14
15
16
17
18
19
20
21
22
23
24
25
26
27
| <template>
<div>
<h3>我是父组件</h3>
<button @click="callChildMethod"> 调用子组件方法 </button>
<child-view ref="childRef" />
</div>
</template>
<script>
import ChildView from './ChildView.vue';
export default {
components: {
ChildView
},
data() {
return {
message : ''
}
},
methods: {
callChildMethod() {
this.$refs.childRef.childMethod();
},
},
};
</script>
|
1
2
3
4
5
6
7
8
9
10
11
12
13
14
15
16
17
18
19
20
21
| <template>
<div>
<h3>我是子组件</h3>
<p>{{ message }}</p>
</div>
</template>
<script>
export default {
data() {
return {
message : ''
}
},
methods: {
childMethod() {
this.message = '父子调用子组件成功'
},
}
};
</script>
|
 wechat
 alipay